A simple way to register on Hyperliquid
To authorize yourself on Hyperliquid, you need to connect your Web3 wallet.
For the easiest setup, we recommend using the MetaMask browser extension. Alternatively, MetaMask must be installed on your phone.
1) Open Hyperliquid using a referral link and receive a discount on commissions.
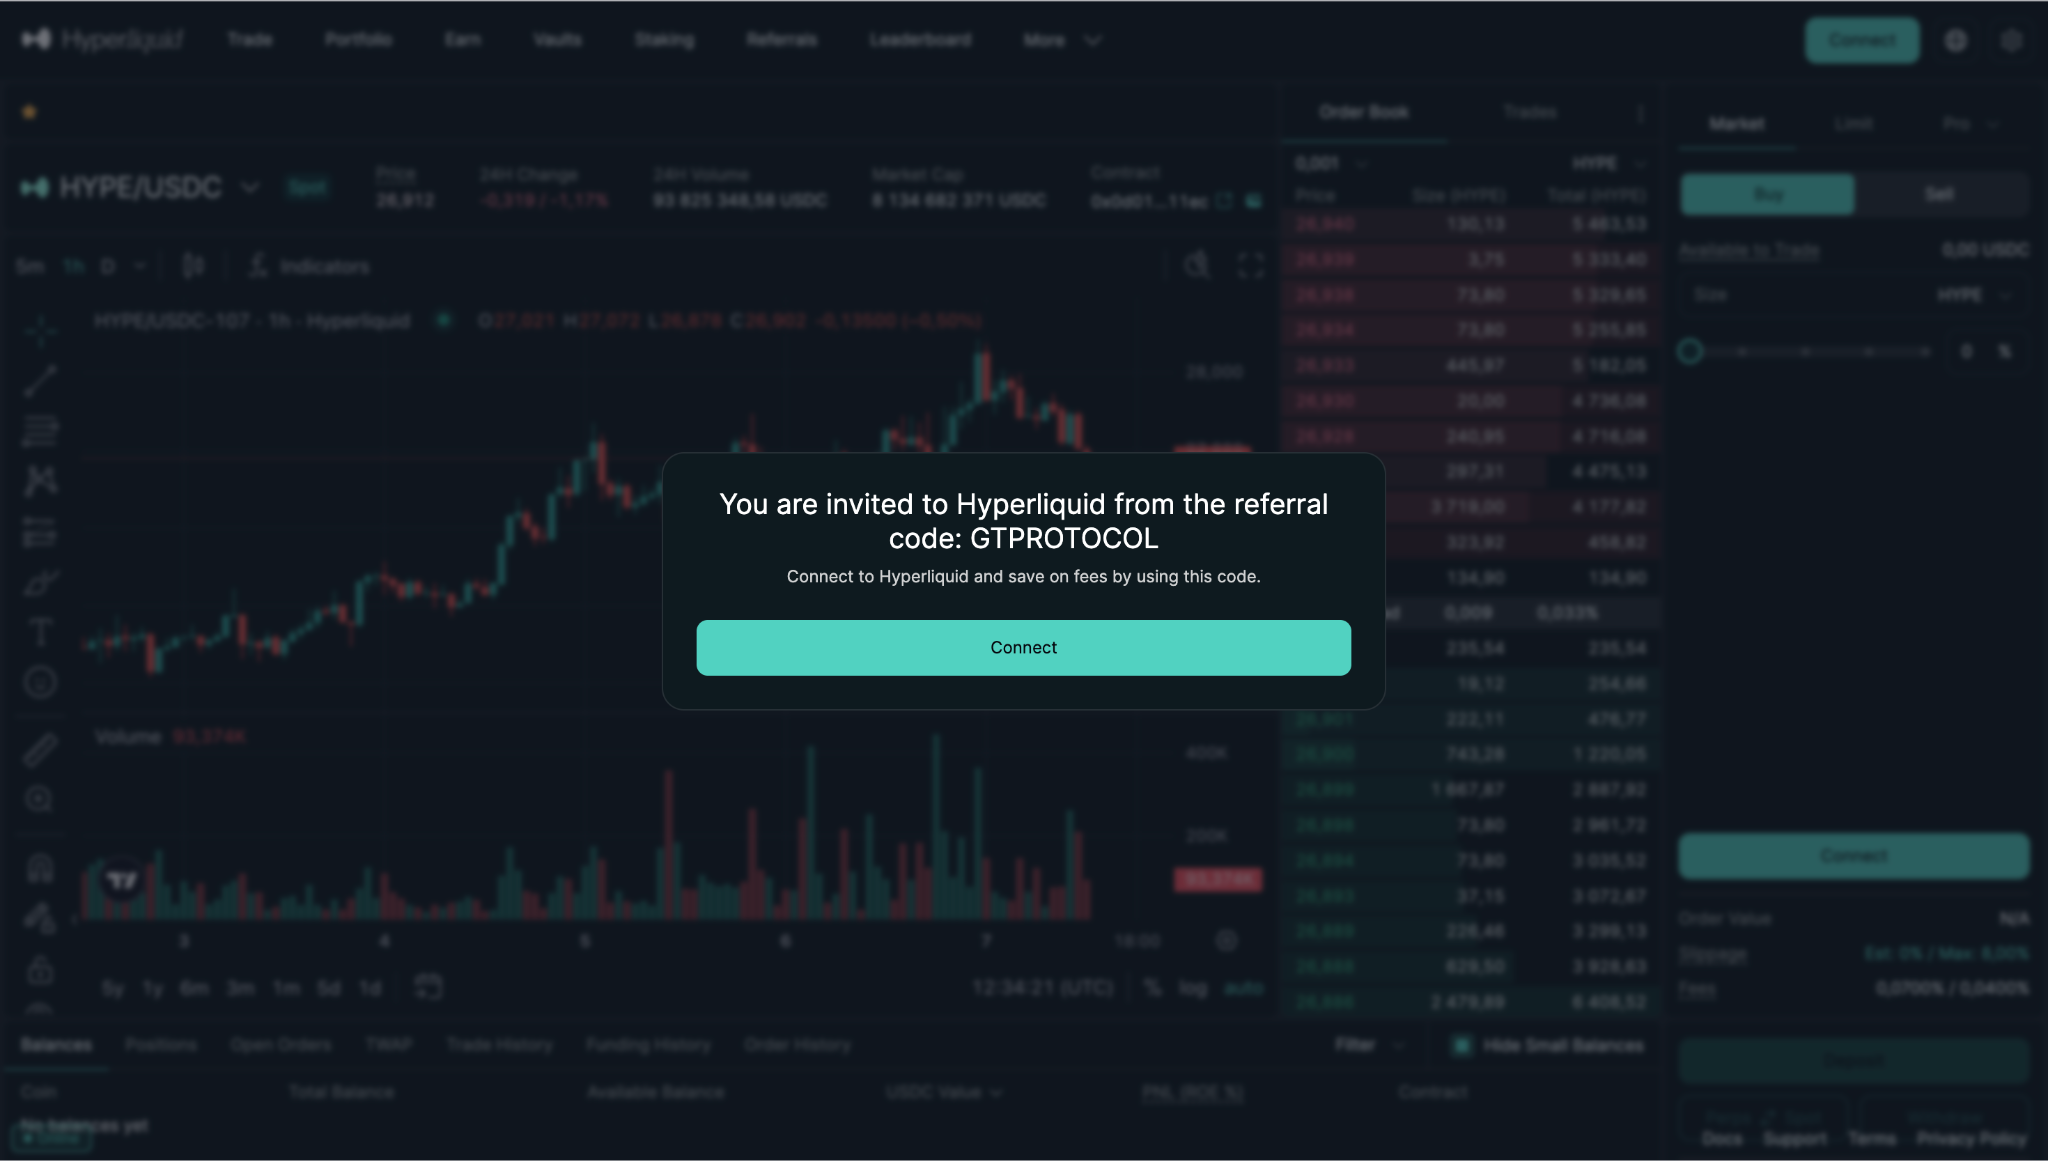
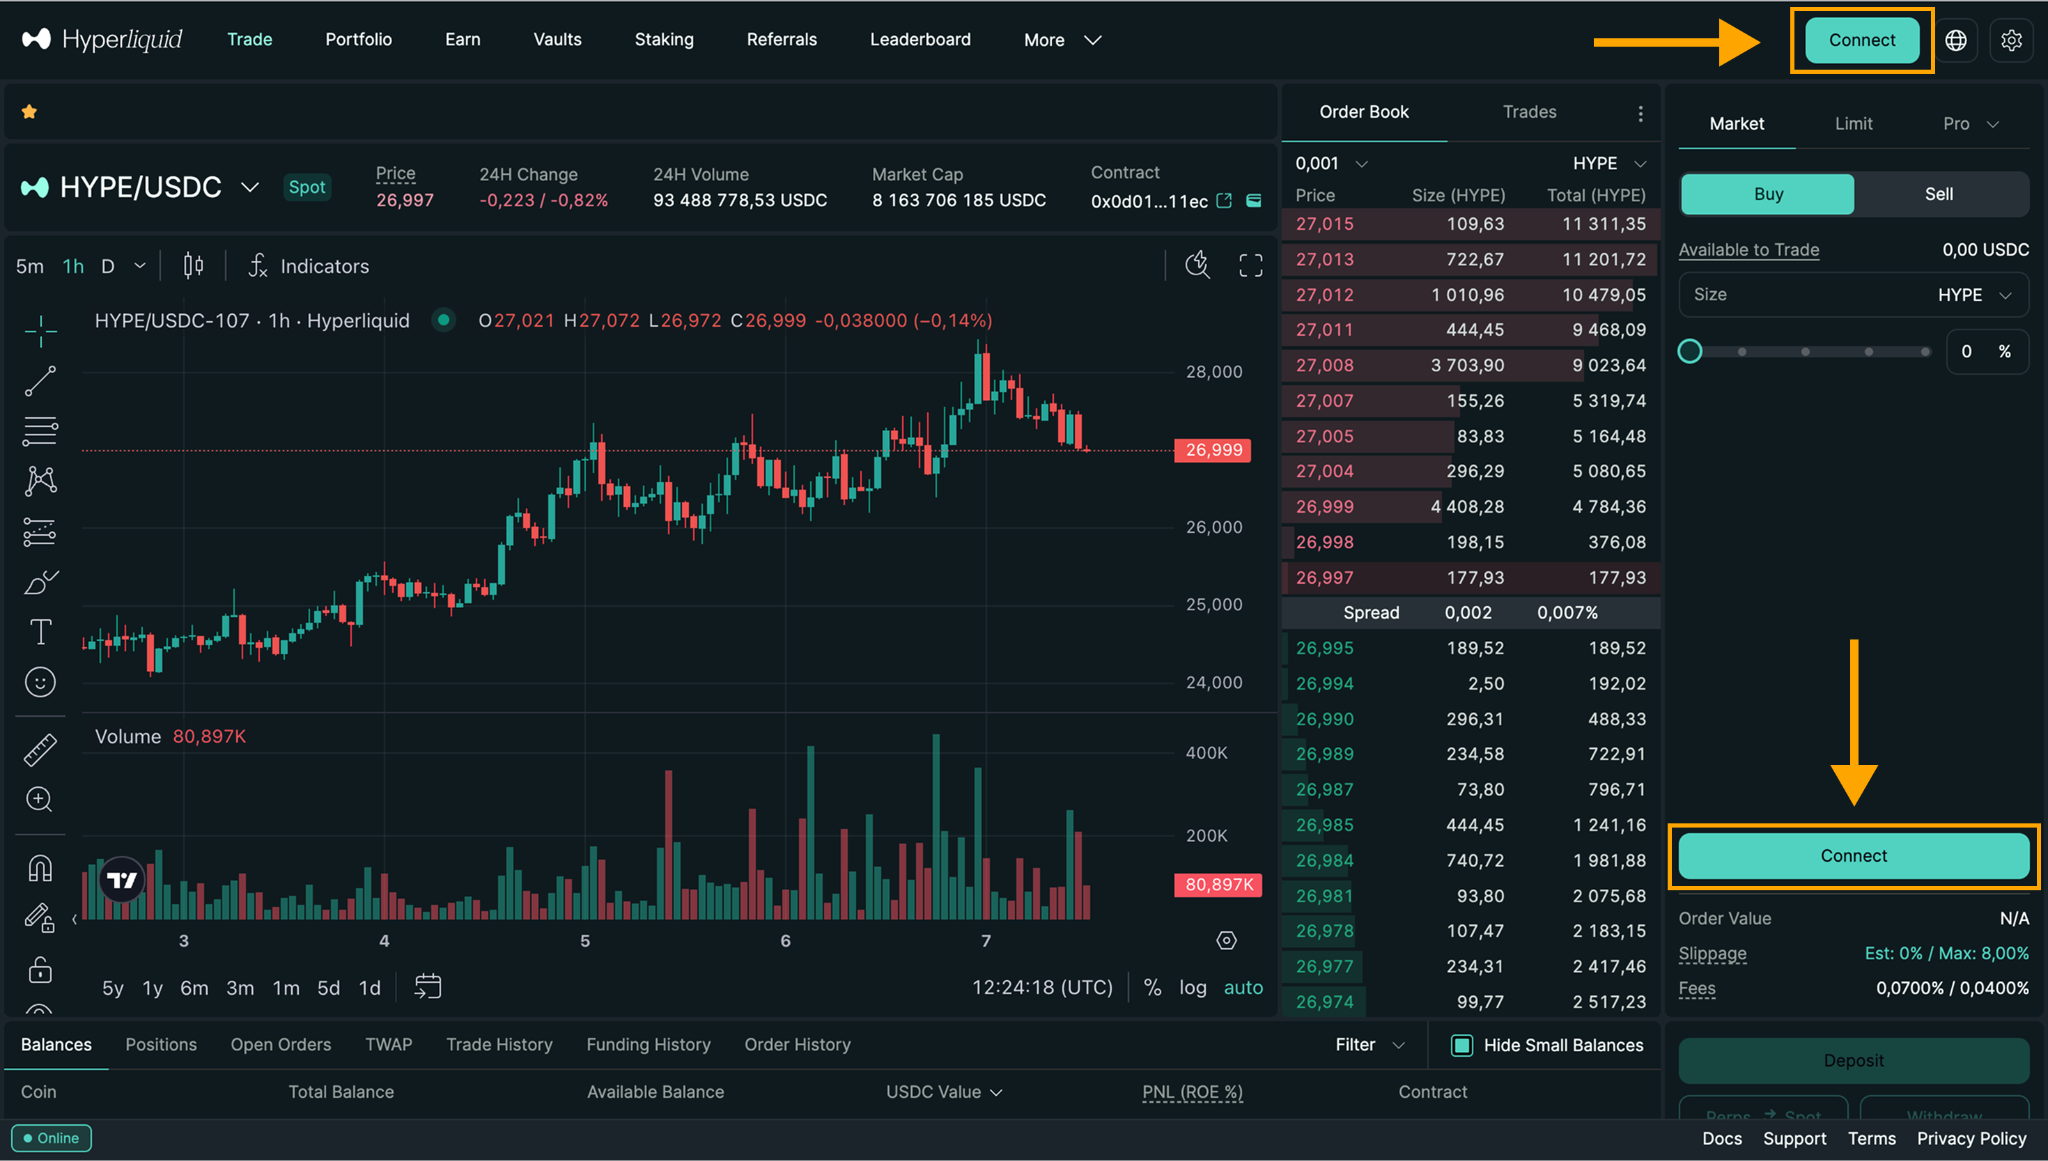
1.1 Click Connect.
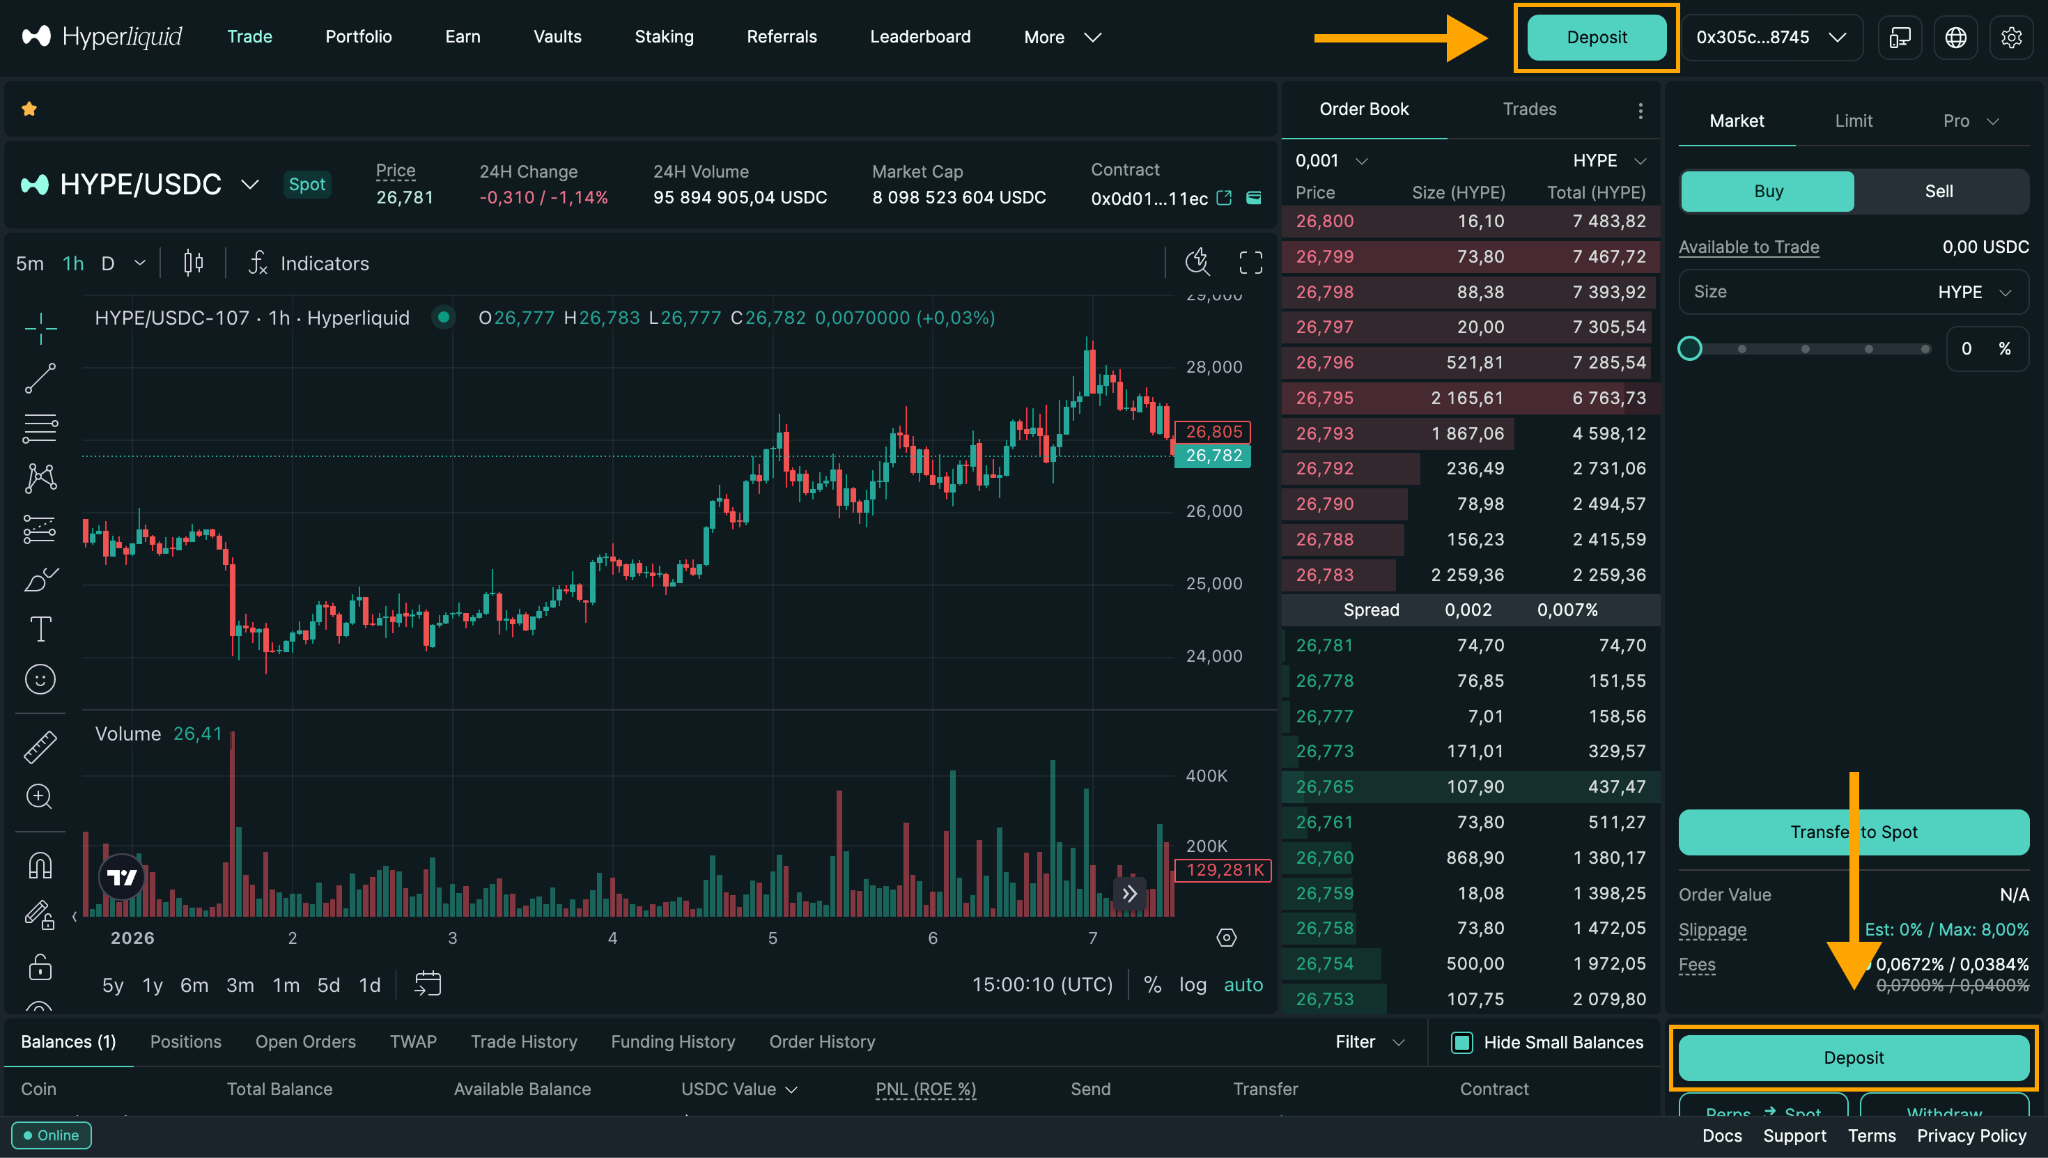
* The buttons for authorization in the Hyperliquid interface are located here: in the top-right corner and at the bottom left of the exchange interface.
2) Select MetaMask (for those who have the browser extension installed).
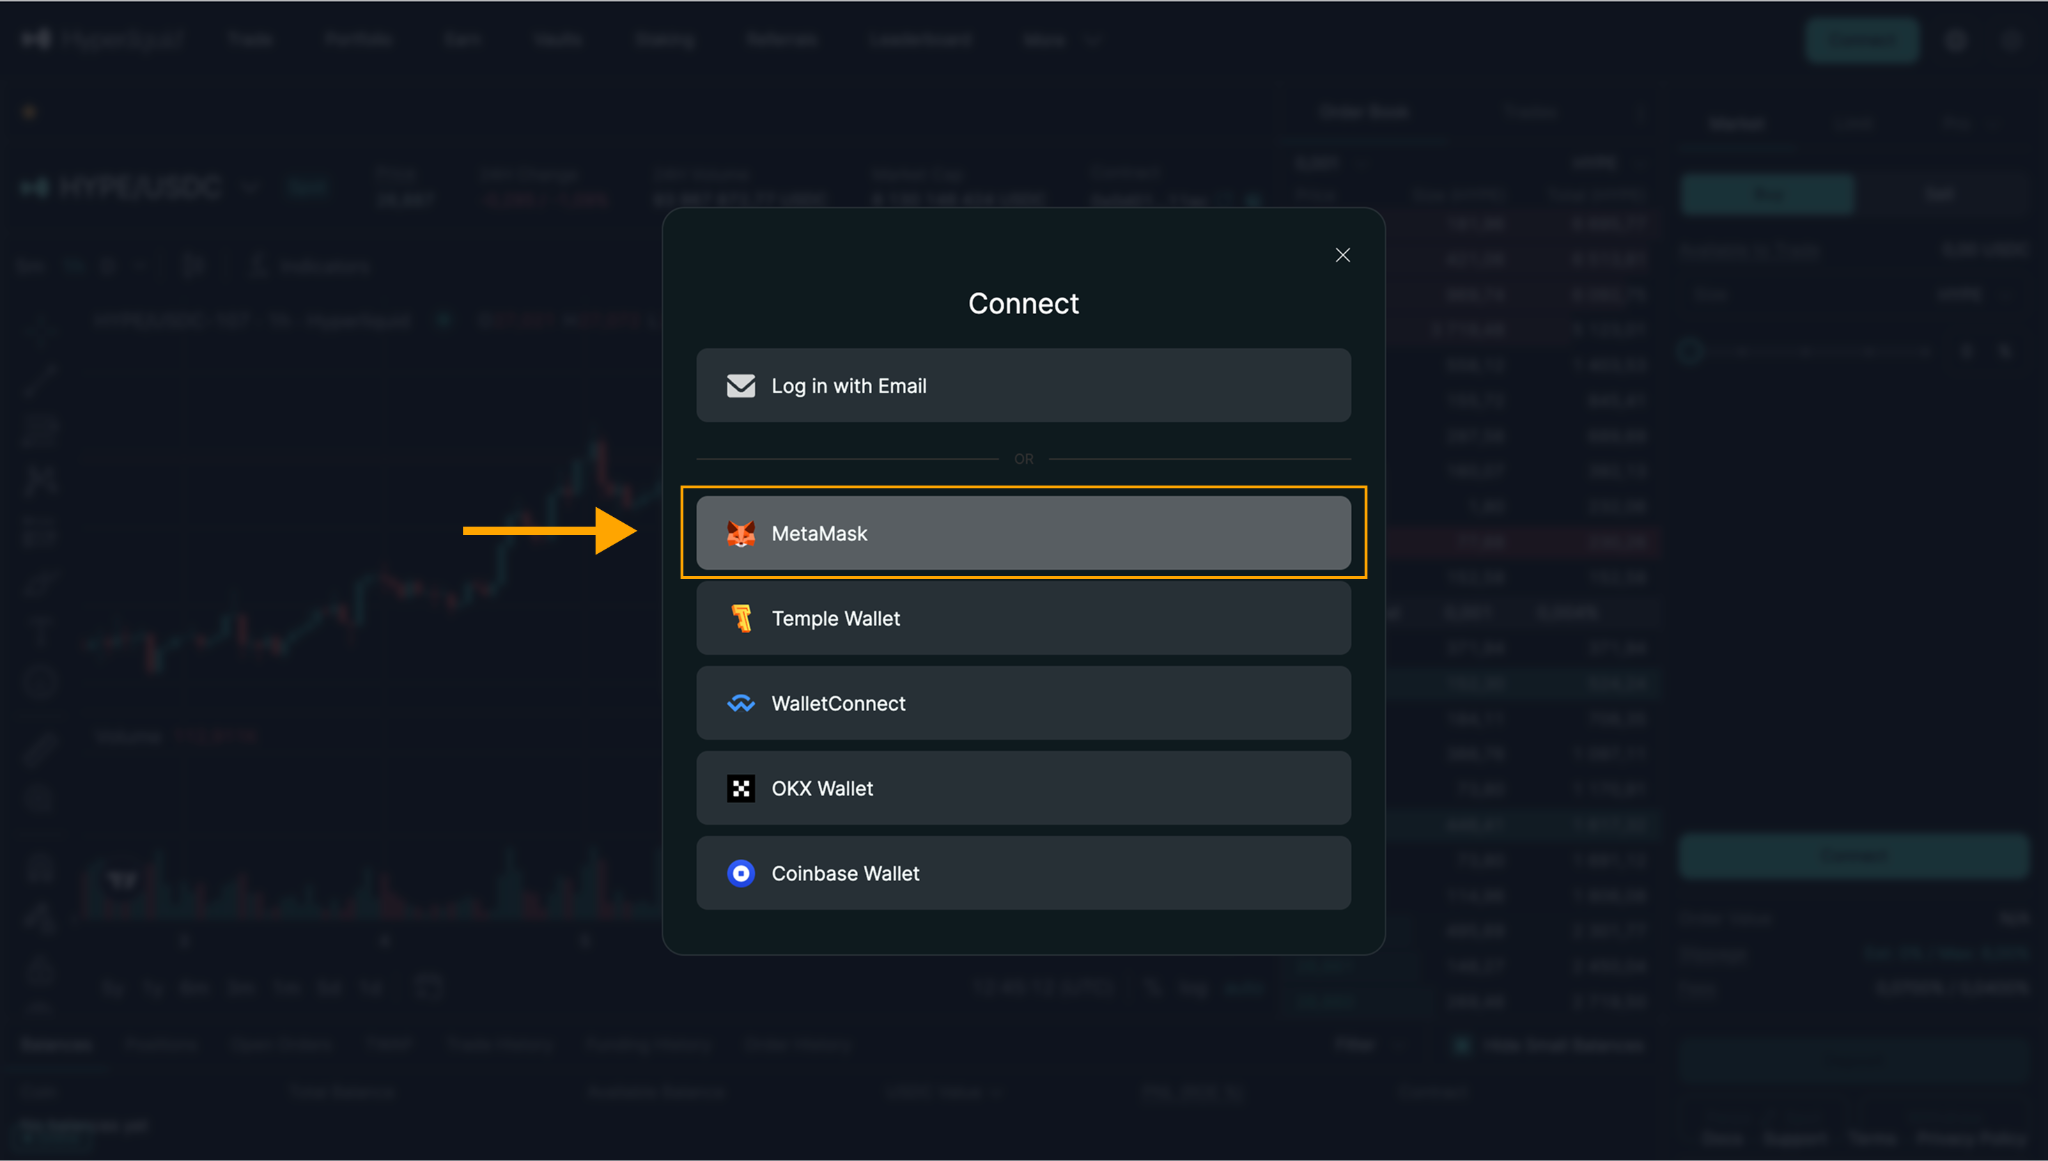
2.1 In the wallet selection window, choose MetaMask (or Browser wallet if MetaMask is grouped under that option).
A MetaMask pop-up will appear asking you to connect. Go to step 3.
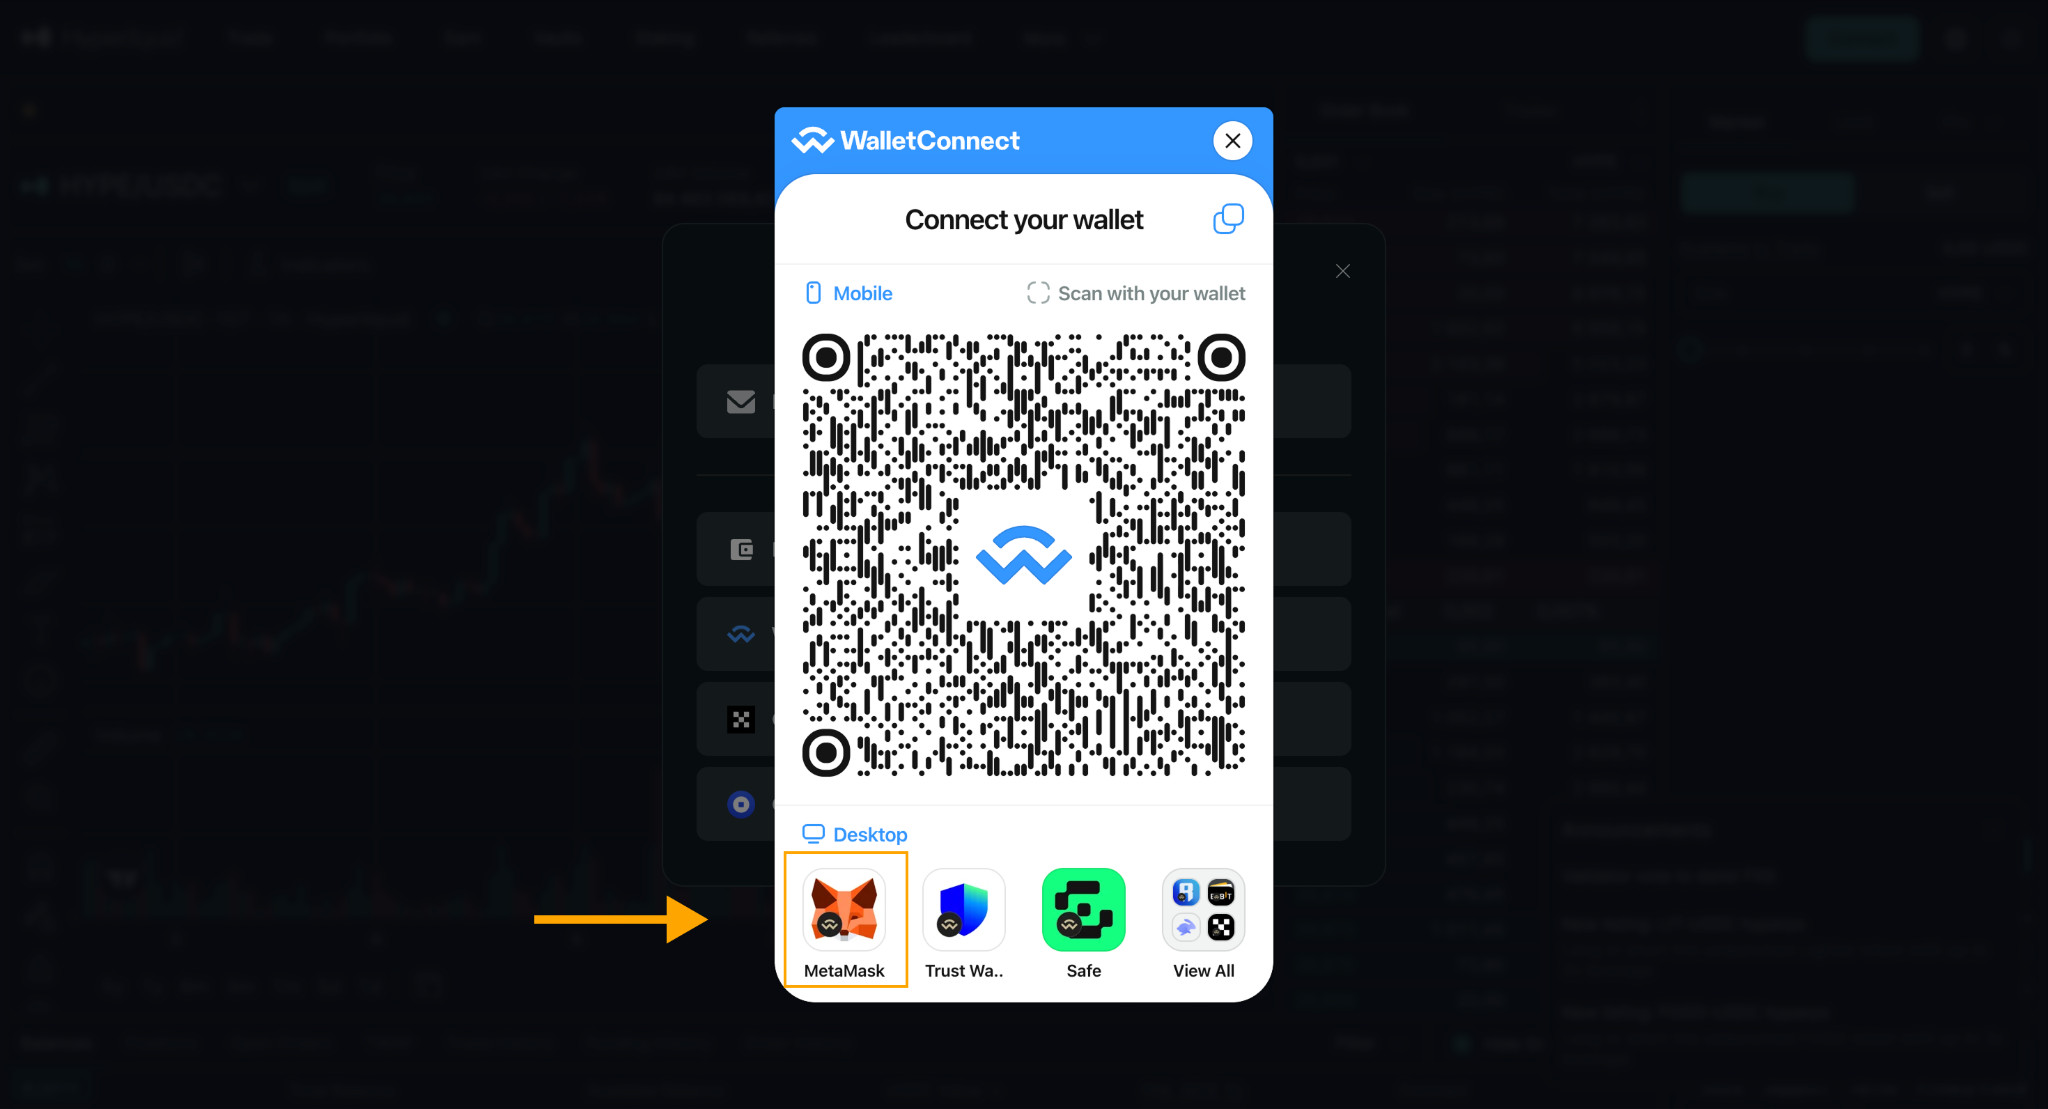
2.2 If you don’t have the MetaMask browser extension, but it’s installed on your phone, click Wallet Connect.
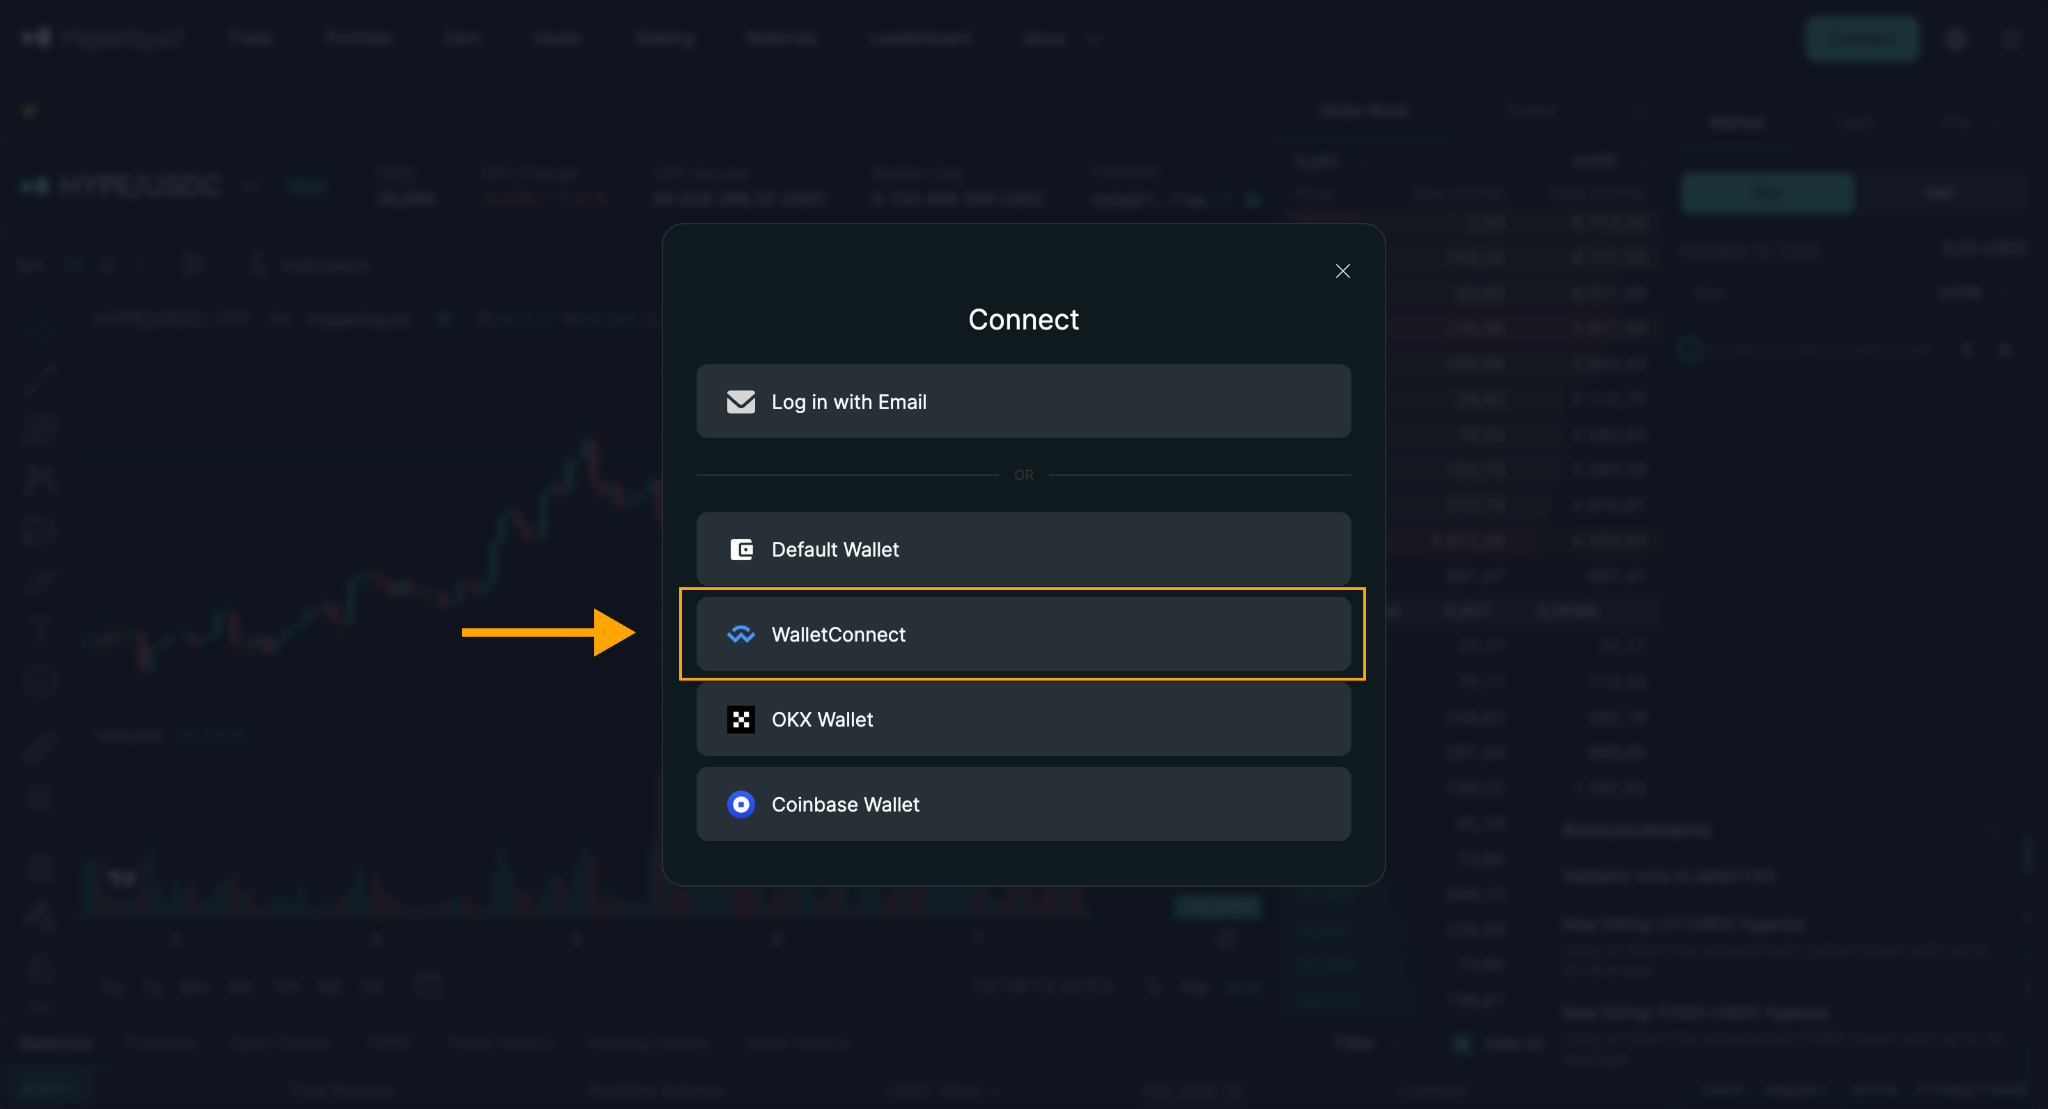
2.3 In the pop-up window that appears, click the MetaMask icon, and then scan the code that appears in the MetaMask mobile app.
3) Confirm the connection in MetaMask
3.1 Double-check that the website URL is app.hyperliquid.xyz.
3.2 Select the account you want to use in the edit account section. If you have only one account, it will be displayed automatically, as in our example.
3.3 Click Next → Connect on desktop or in the mobile app to confirm the connection.

4) Please accept required cookies and enabling Trading
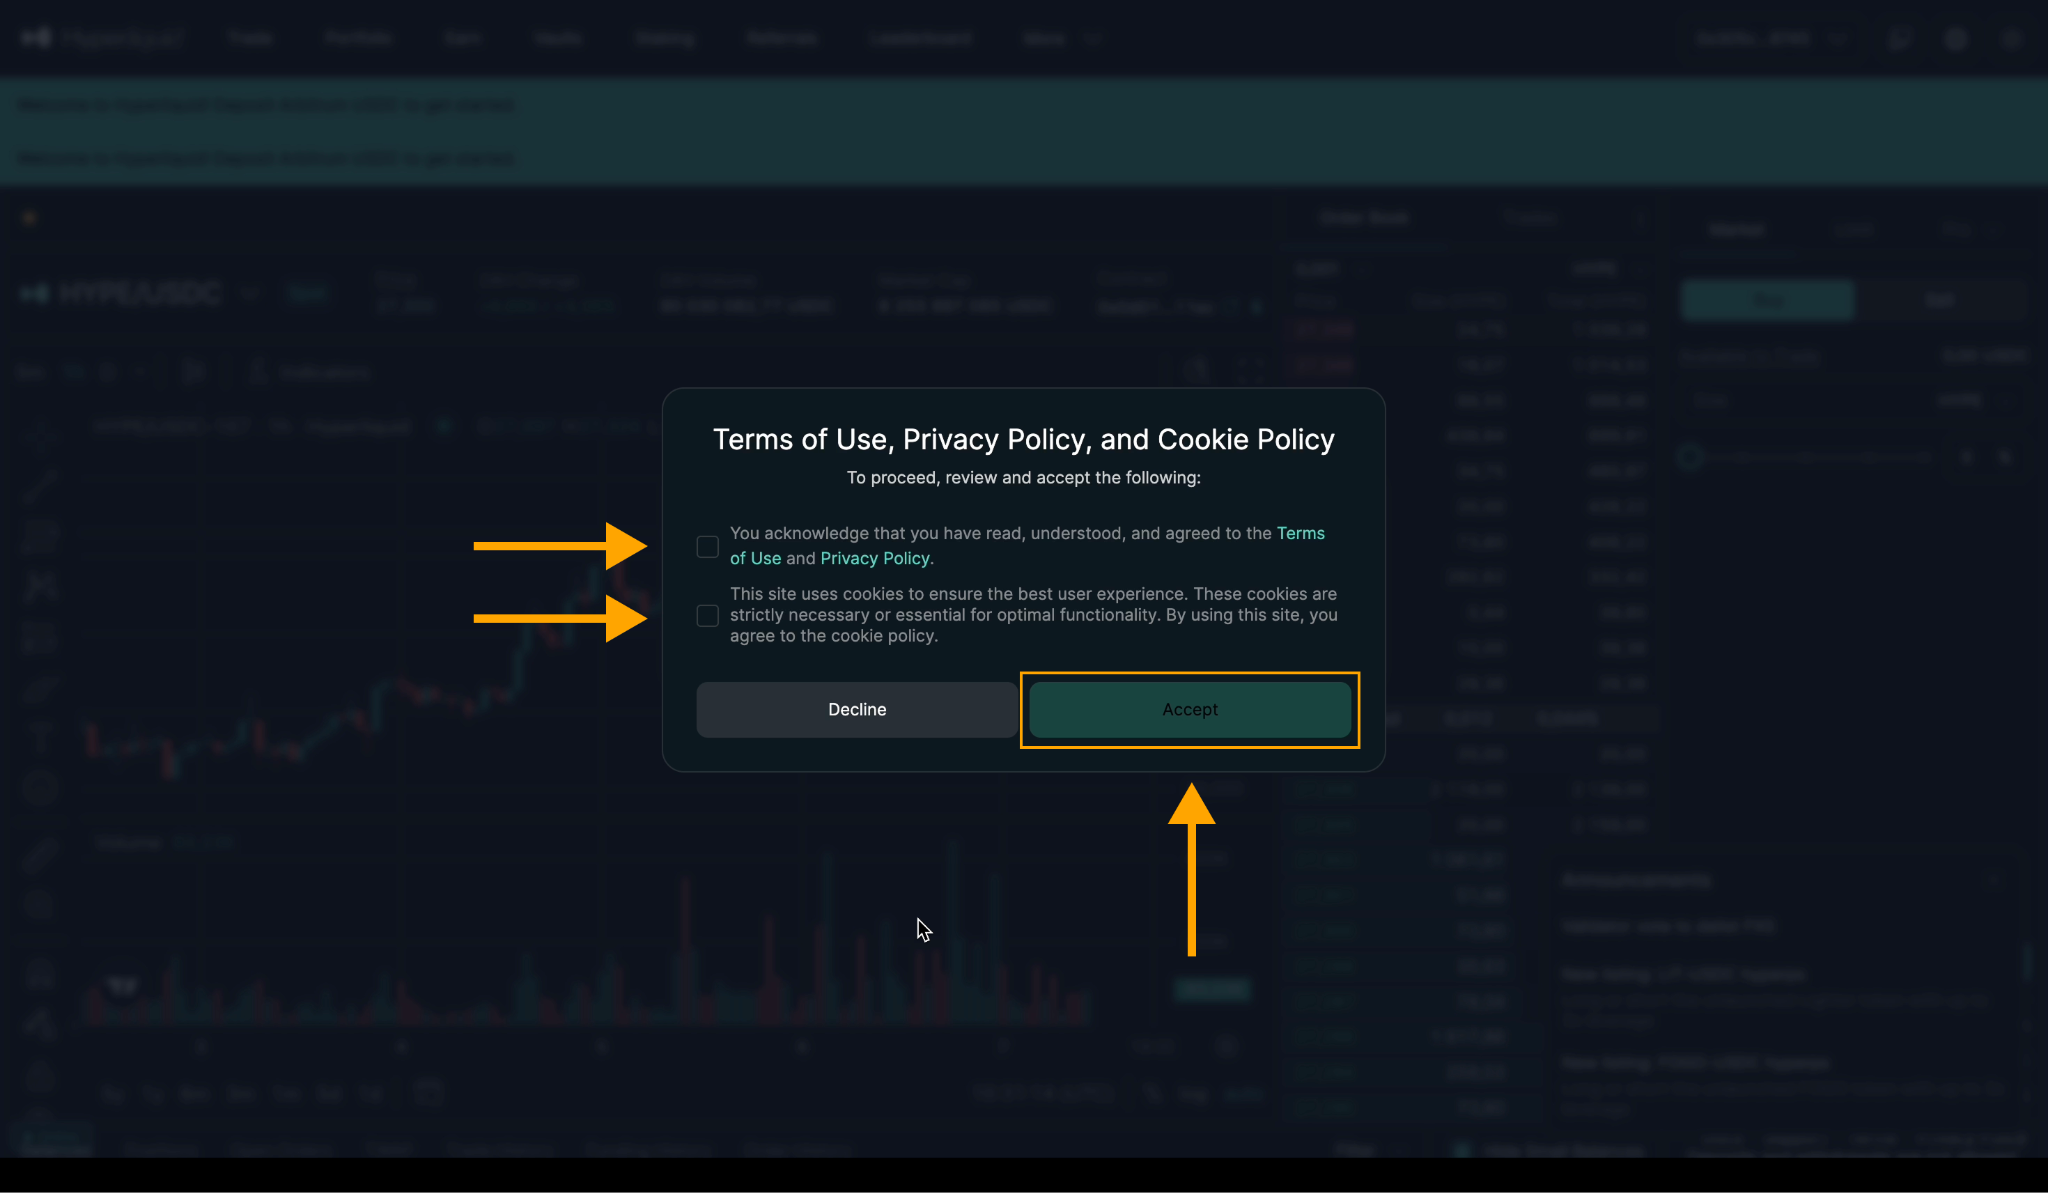
Check the boxes confirming you have read the Terms of Use and Privacy Policy documents, as well as the box next to the section stating that the site collects cookies and you agree to the cookie policy.
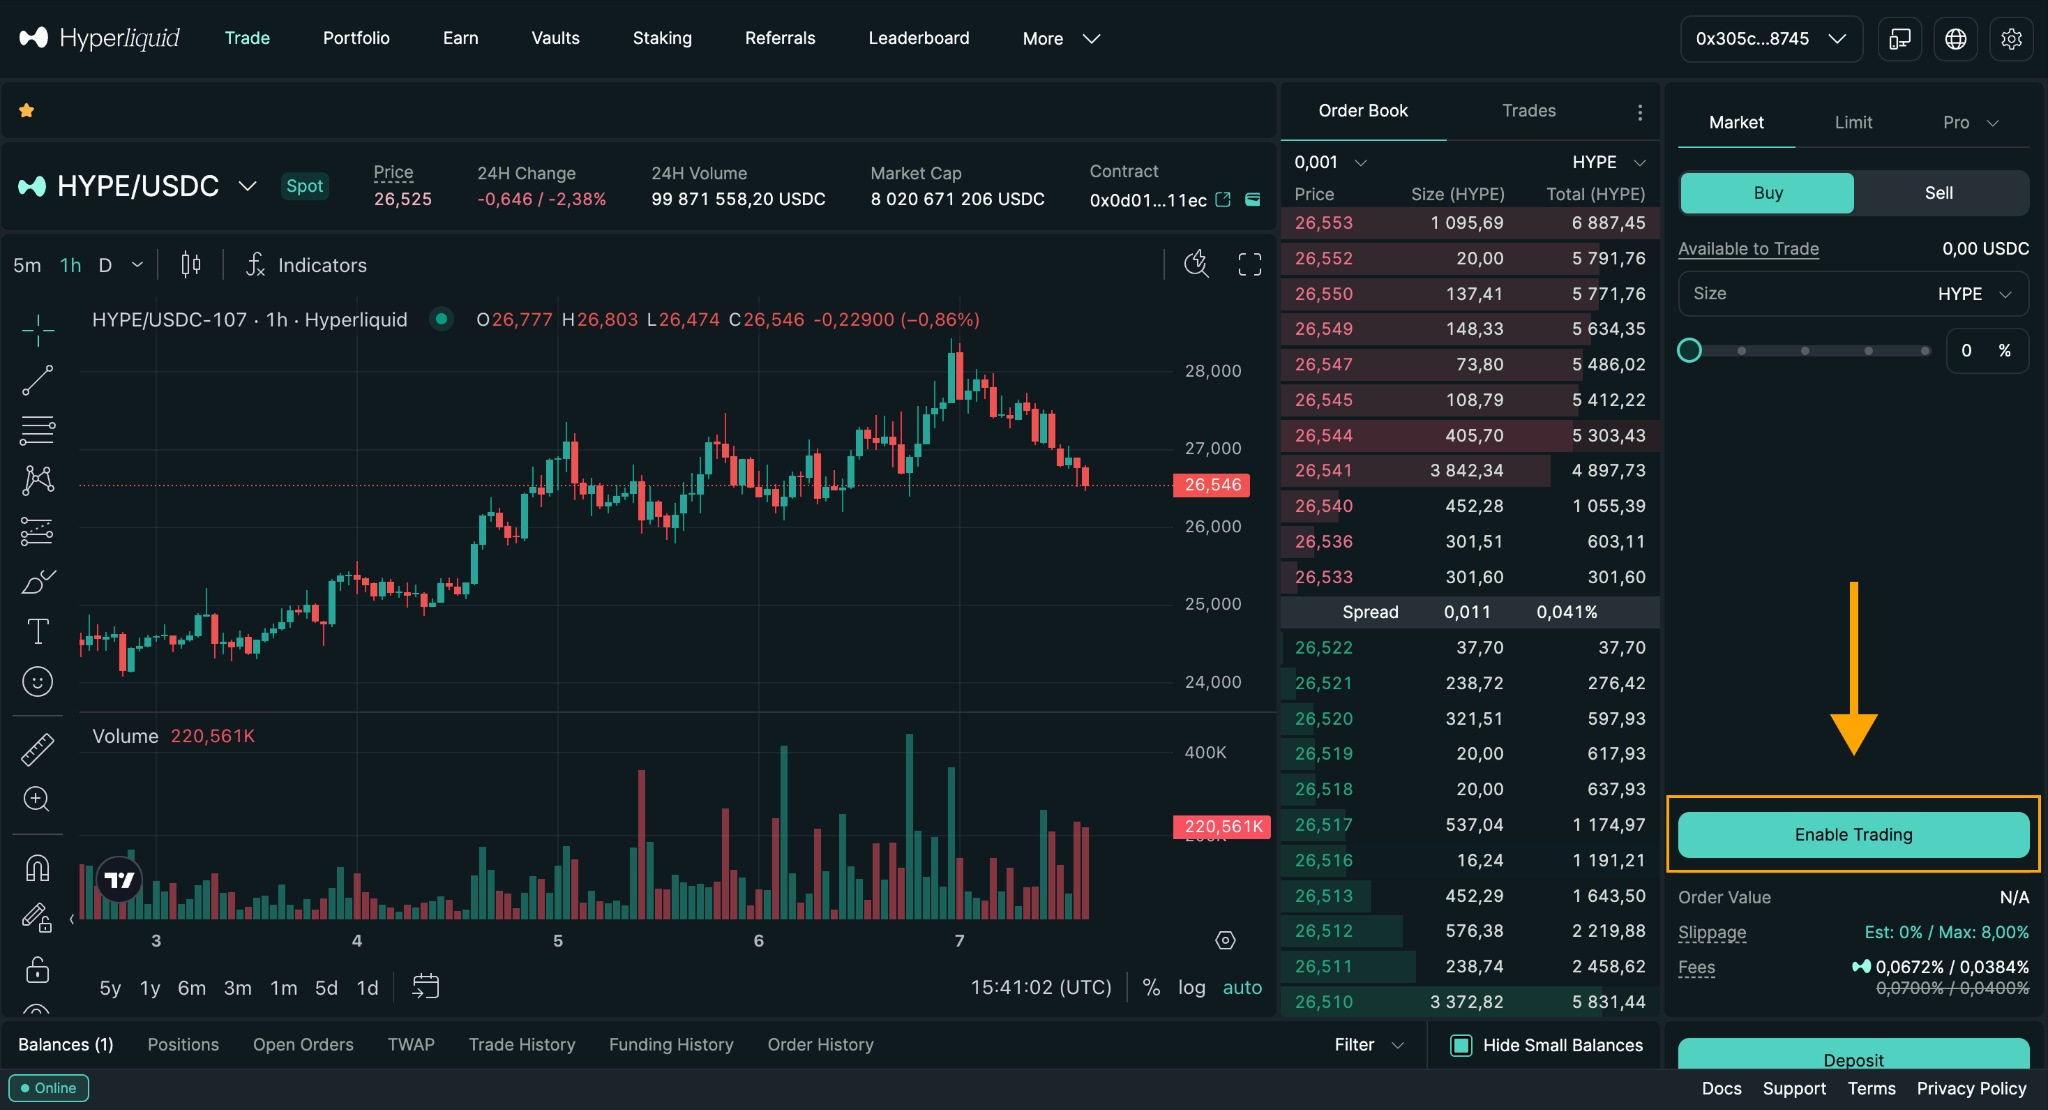
After connecting the wallet, you’ll see an Enable Trading button in the Hyperliquid interface.
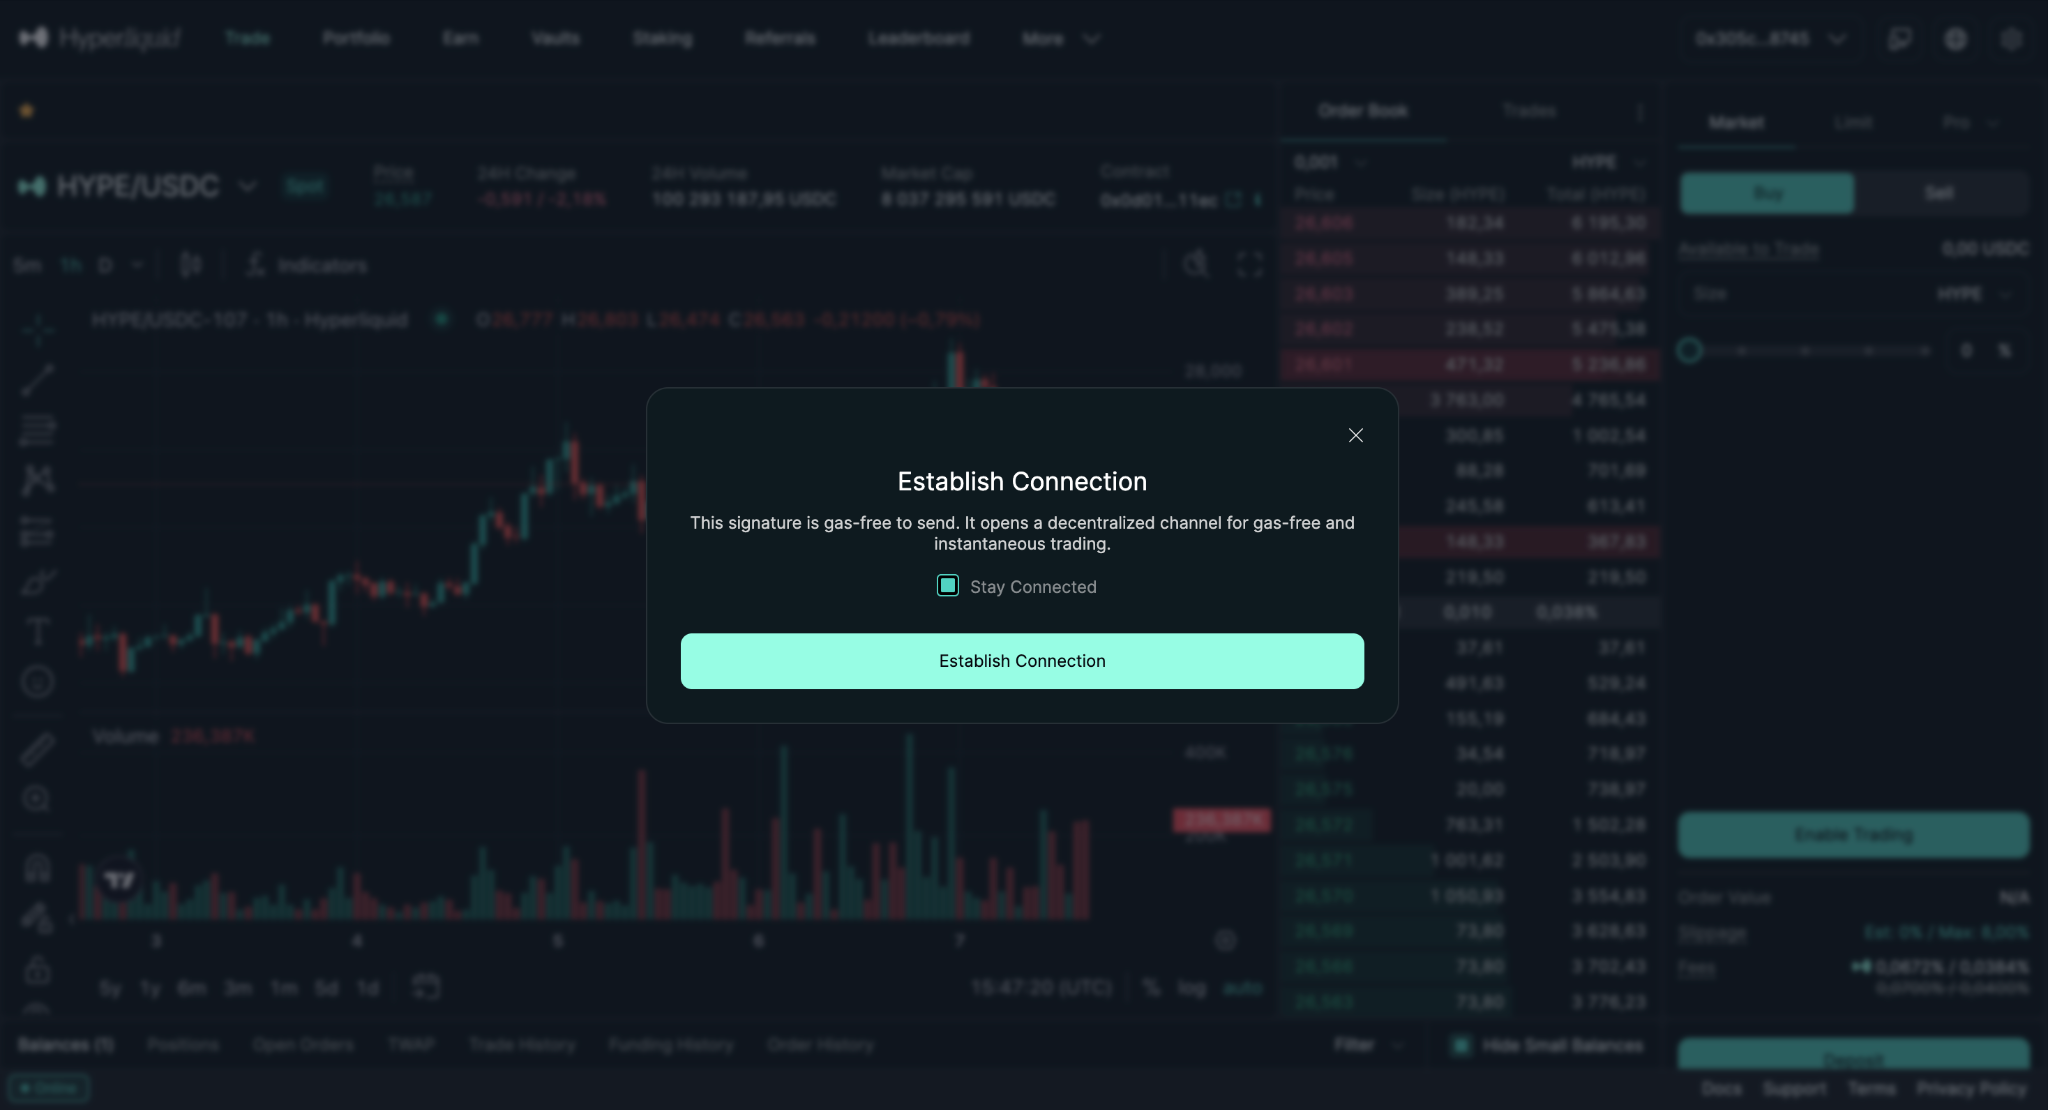
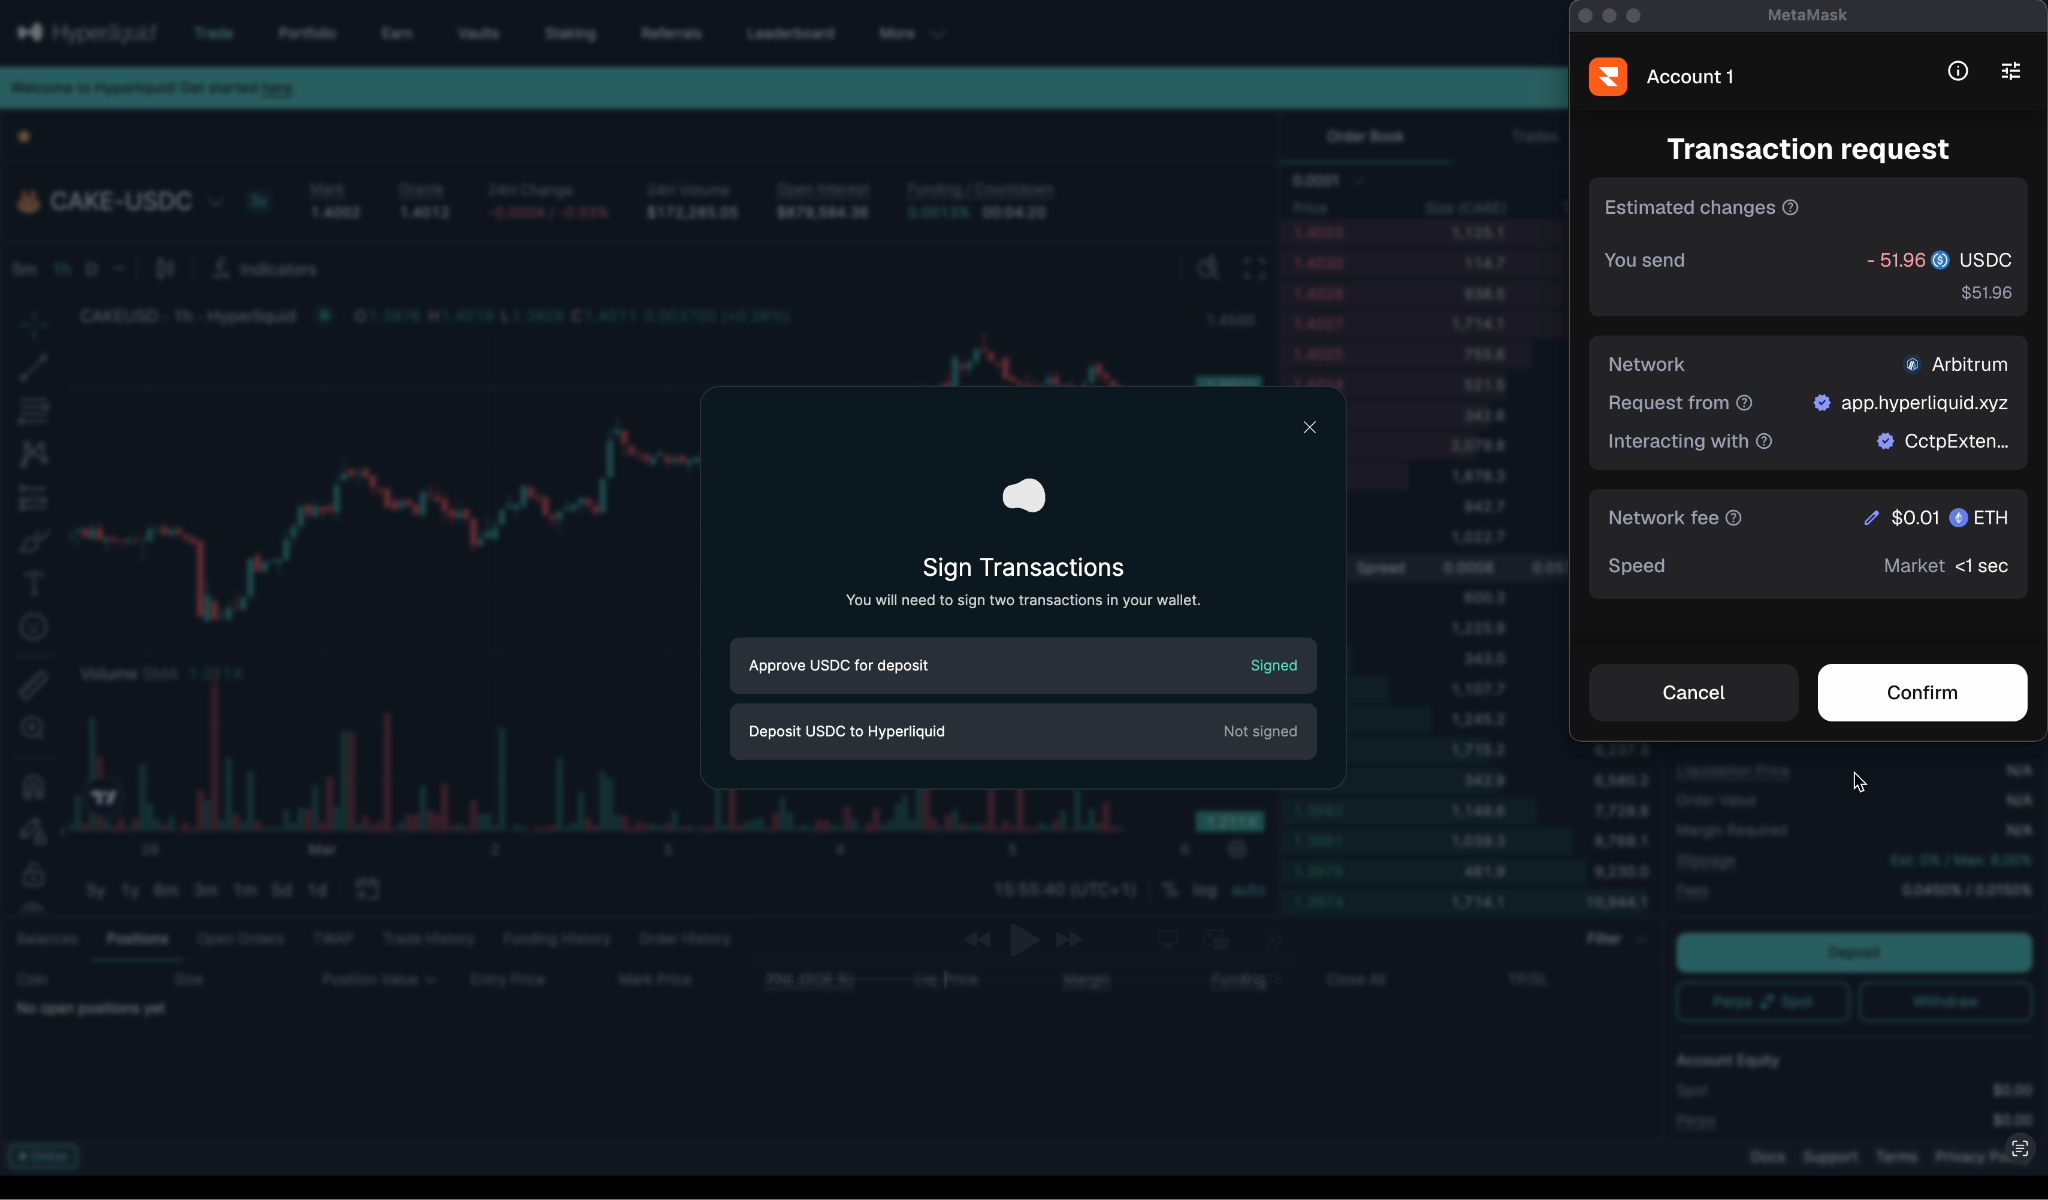
Click Enable Trading. MetaMask will prompt you to sign a gasless transaction to authorize trading on Hyperliquid.
5) Creating an API
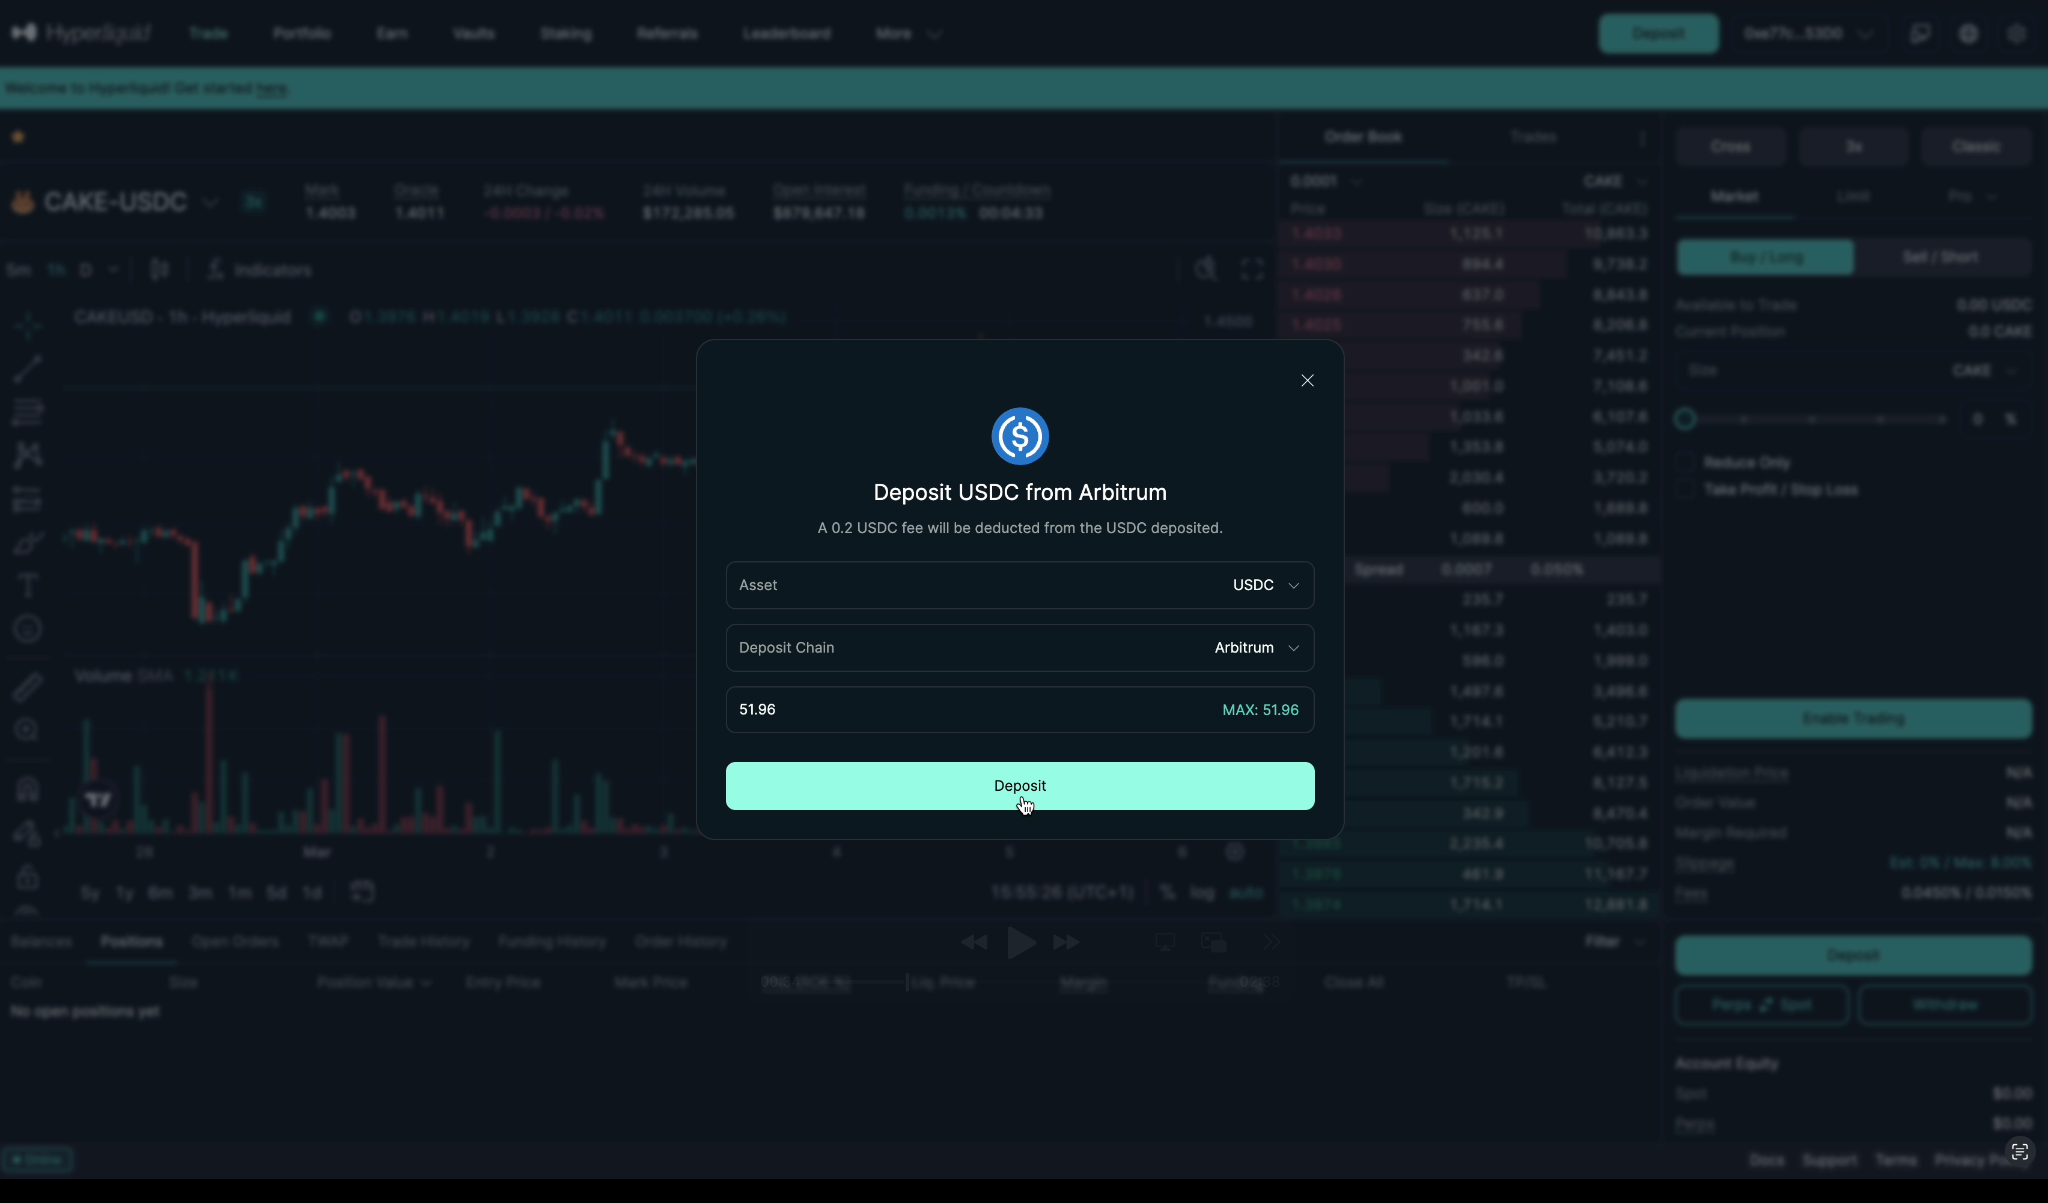
Before you can generate an API Private Key, you must fund your Hyperliquid account.
Important:
- Hyperliquid requires a minimum deposit of 5 USDC on the Arbitrum network before you can generate a Private Key.
- You may also need a small amount of ETH on Arbitrum for gas fees.
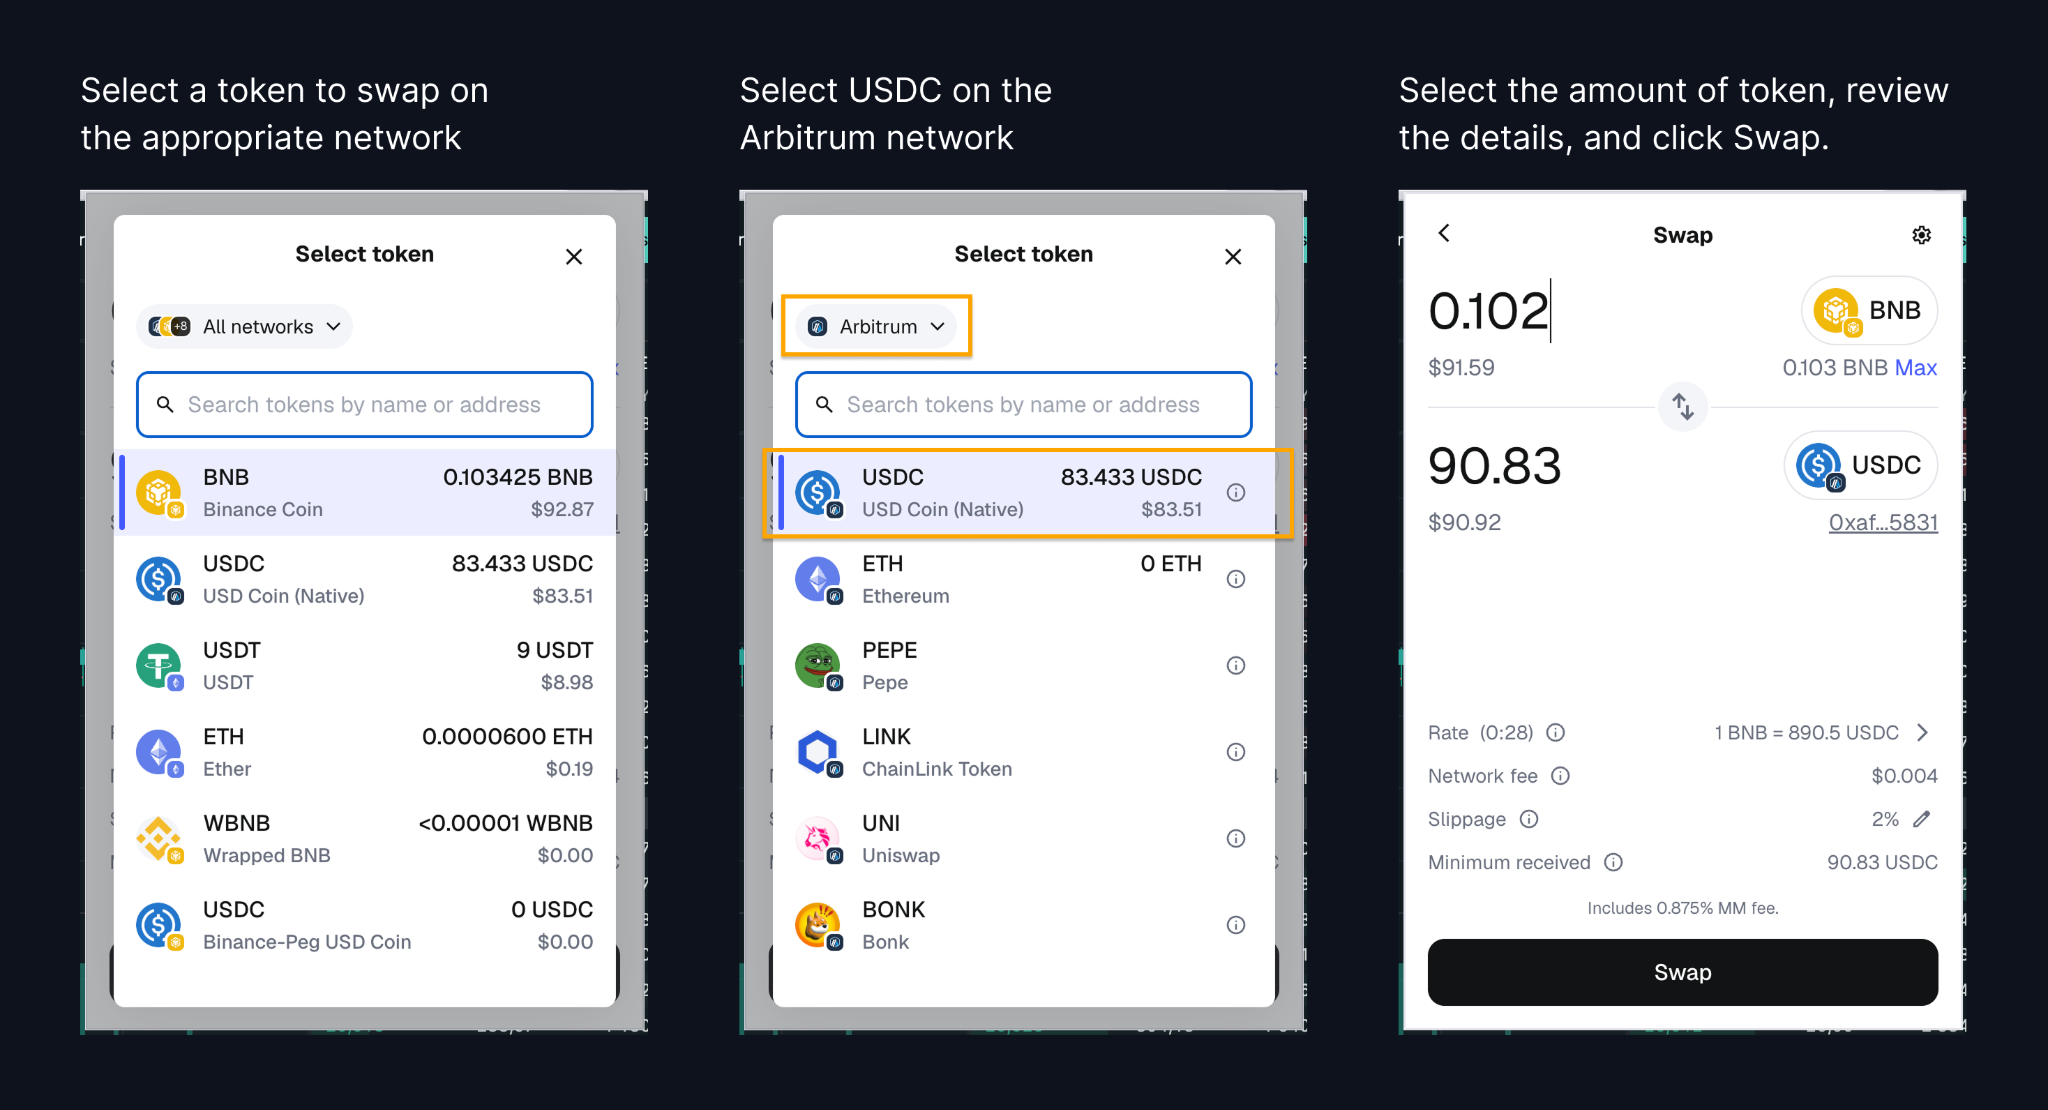
If you don’t yet have USDC on Arbitrum, you can swap tokens directly inside your wallet (for example using the MetaMask built-in Swap feature) and convert your assets to USDC on the Arbitrum network, then deposit them to Hyperliquid.
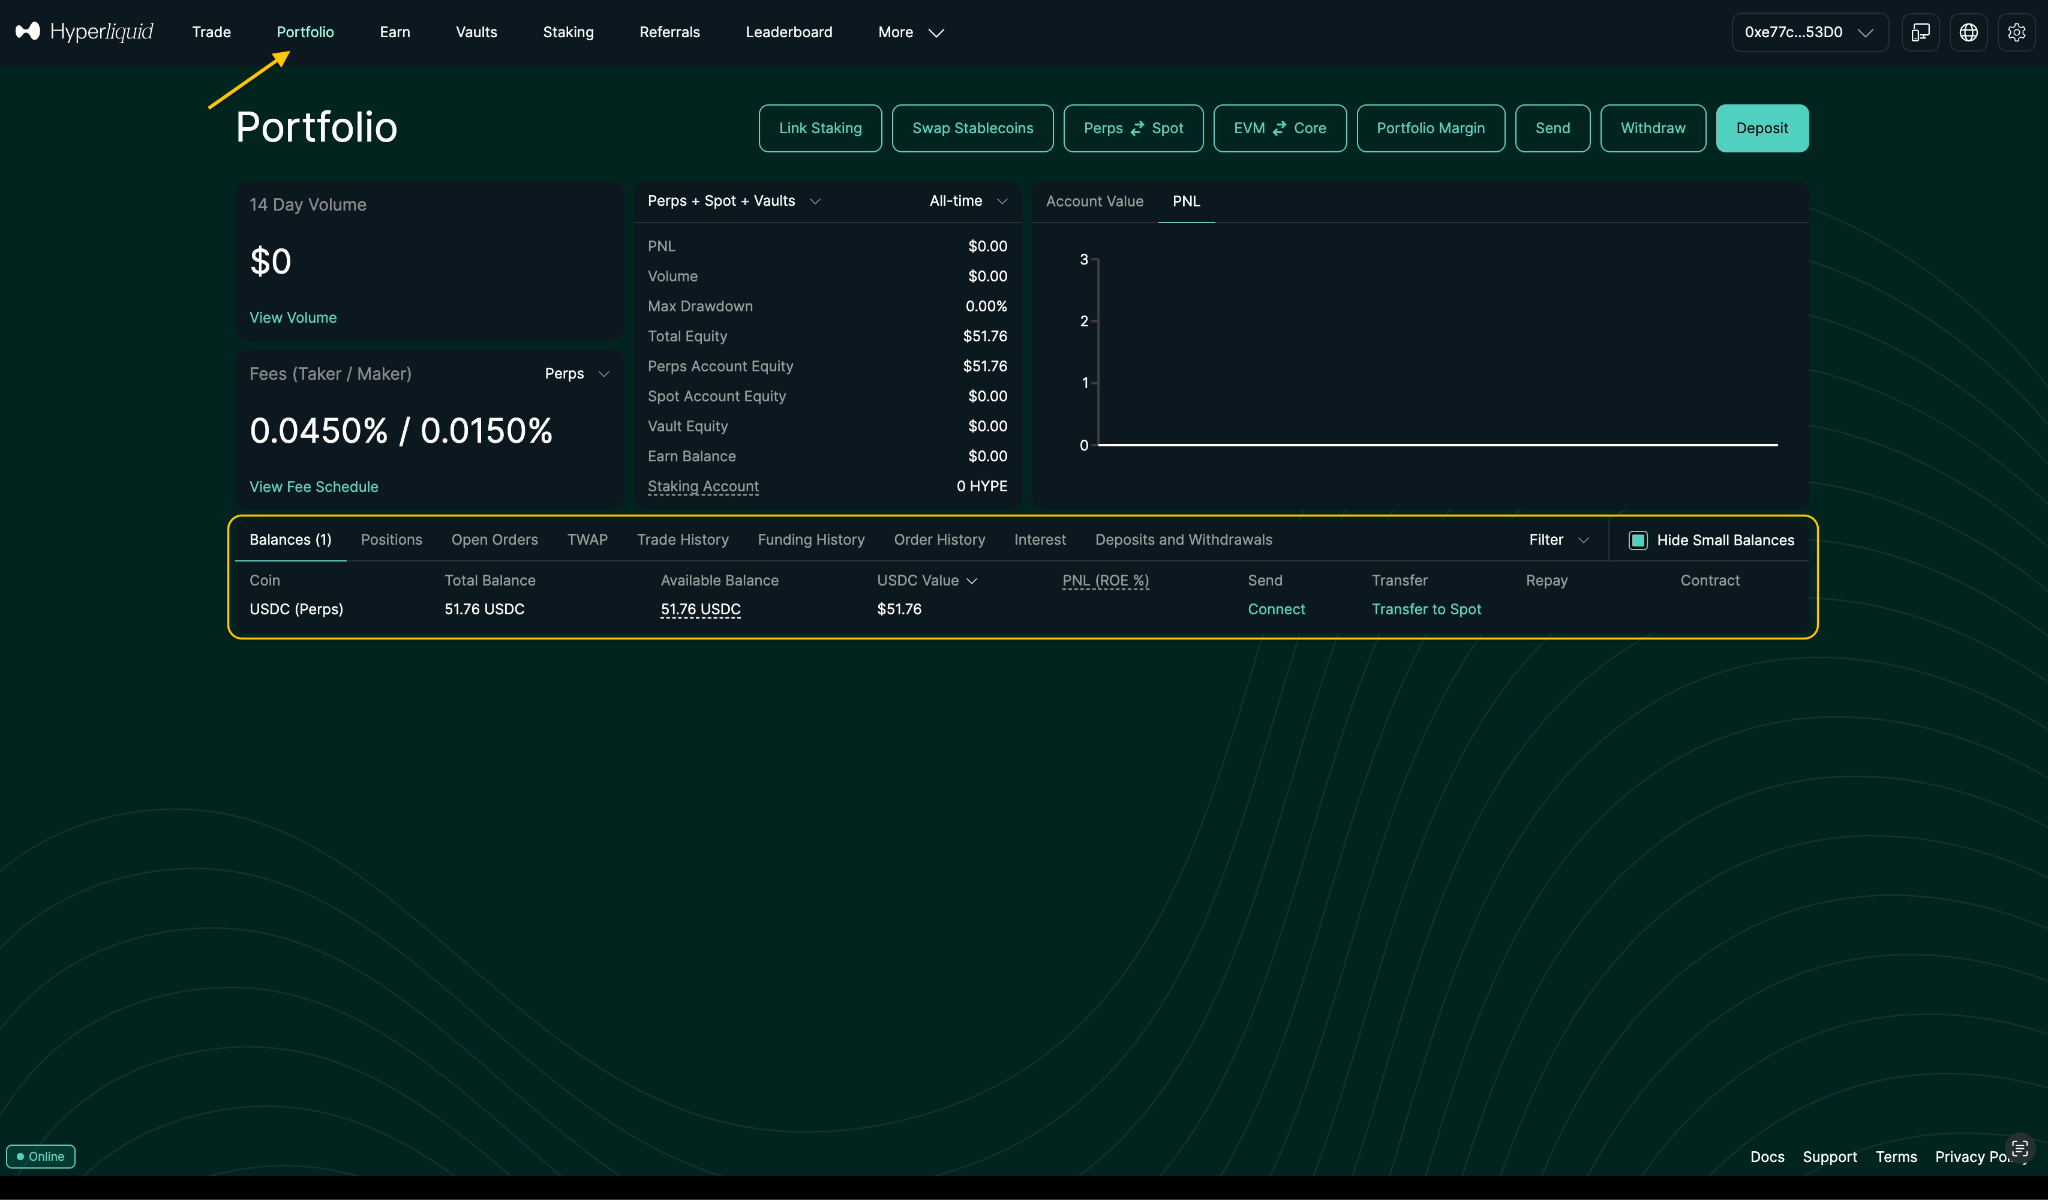
After making a deposit, you can view your HyperLiquid balance in the Portfolio tab.
In this tab, you can also manage transfers between your spot and futures accounts.
Please keep in mind that it is not necessary to use Metamask specifically.
You can use any wallet you are familiar with that is compatible with Hyperliquid.
The next step is creating Private Keys and linking your account to the GT App.
(Optional) Adding the Hyperliquid EVM network to MetaMask
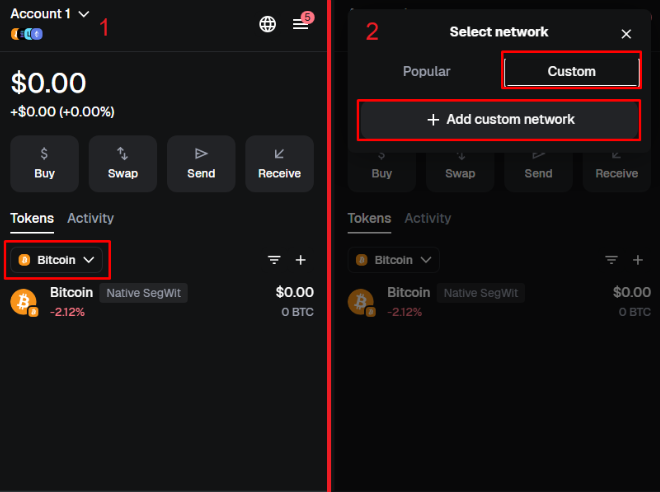
This step is optional and needed only if you want to interact directly with the Hyperliquid EVM network (for example, for on-chain features, HYPE token, etc.), not just trade via the web interface.
Open MetaMask network settings and click on the network dropdown at the top of MetaMask. Click Add network → Add a network manually.
Fill in the Hyperliquid EVM network details.
Network name: Hyperliquid EVM
RPC URL: https://rpc.hyperliquid.xyz/evm
Chain ID: 999
Currency symbol: HYPE
Block explorer (optional): https://hyperevmscan.io
Save and switch to the network
MetaMask will offer to switch to the new network - you can confirm if you plan to use Hyperliquid EVM right away.